Payment Links via web app
Accept payments from anywhere with a secure link
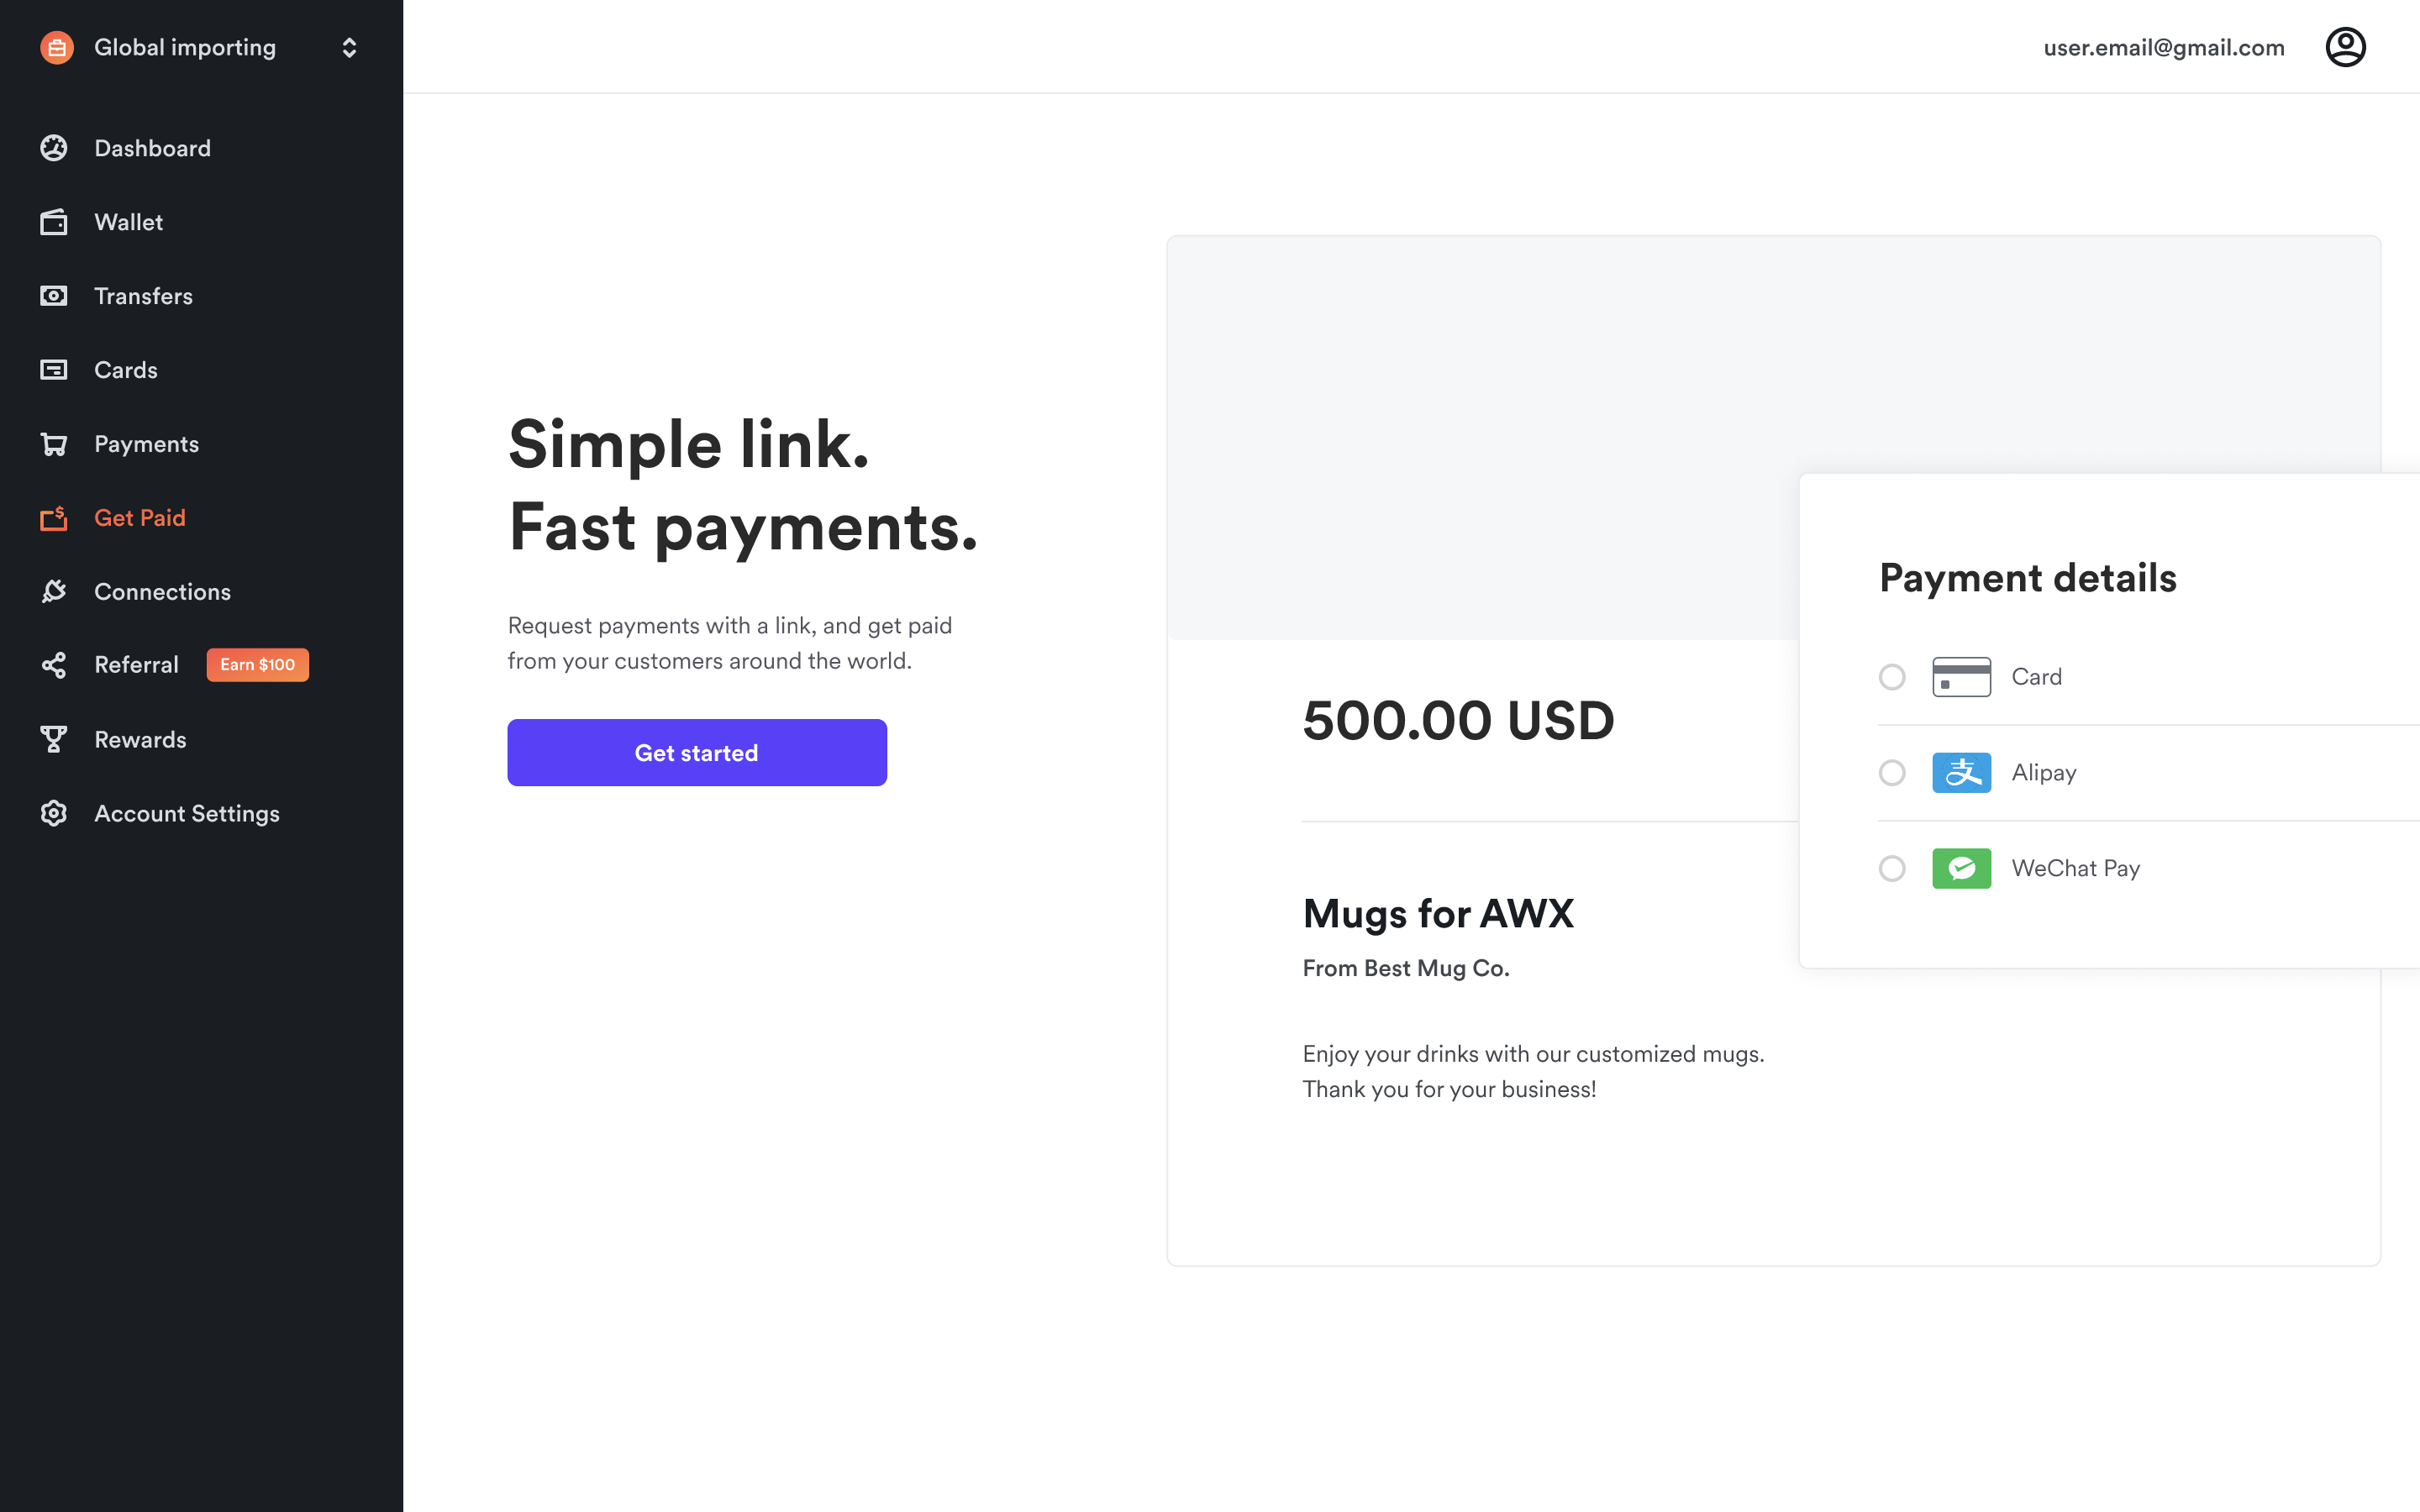
With Payment links, shoppers can make payments just by clicking a payment URL and/or a QR code. The URL takes the cardholder to our Airwallex secure hosted payment page (redirect) where they can pay by simply choosing their preferred payment method (cards or local payment methods). From there, the process is no different than a regular checkout process for an e-commerce transaction.
Use this step-by-step guide to learn how to create a payment link via web app.
Get started
To be able to create a payment link for shoppers, you will need to go through the standard onboarding process and provide information about your business to Airwallex. After the review process is complete, you will be able to share payment links with your customers.
Enable currency switching for your shoppers
To allow shoppers to pay in their preferred local currency regardless of the currency in the payment link, go to Payments > Settings in your Airwallex web app and turn on "Automatic Currency Conversion". For more details, see Automatic currency conversion.

Shoppers can choose to pay in their preferred currency during payment.

Customize your branding
- In your web app, go to Payments > Payment Links > Settings
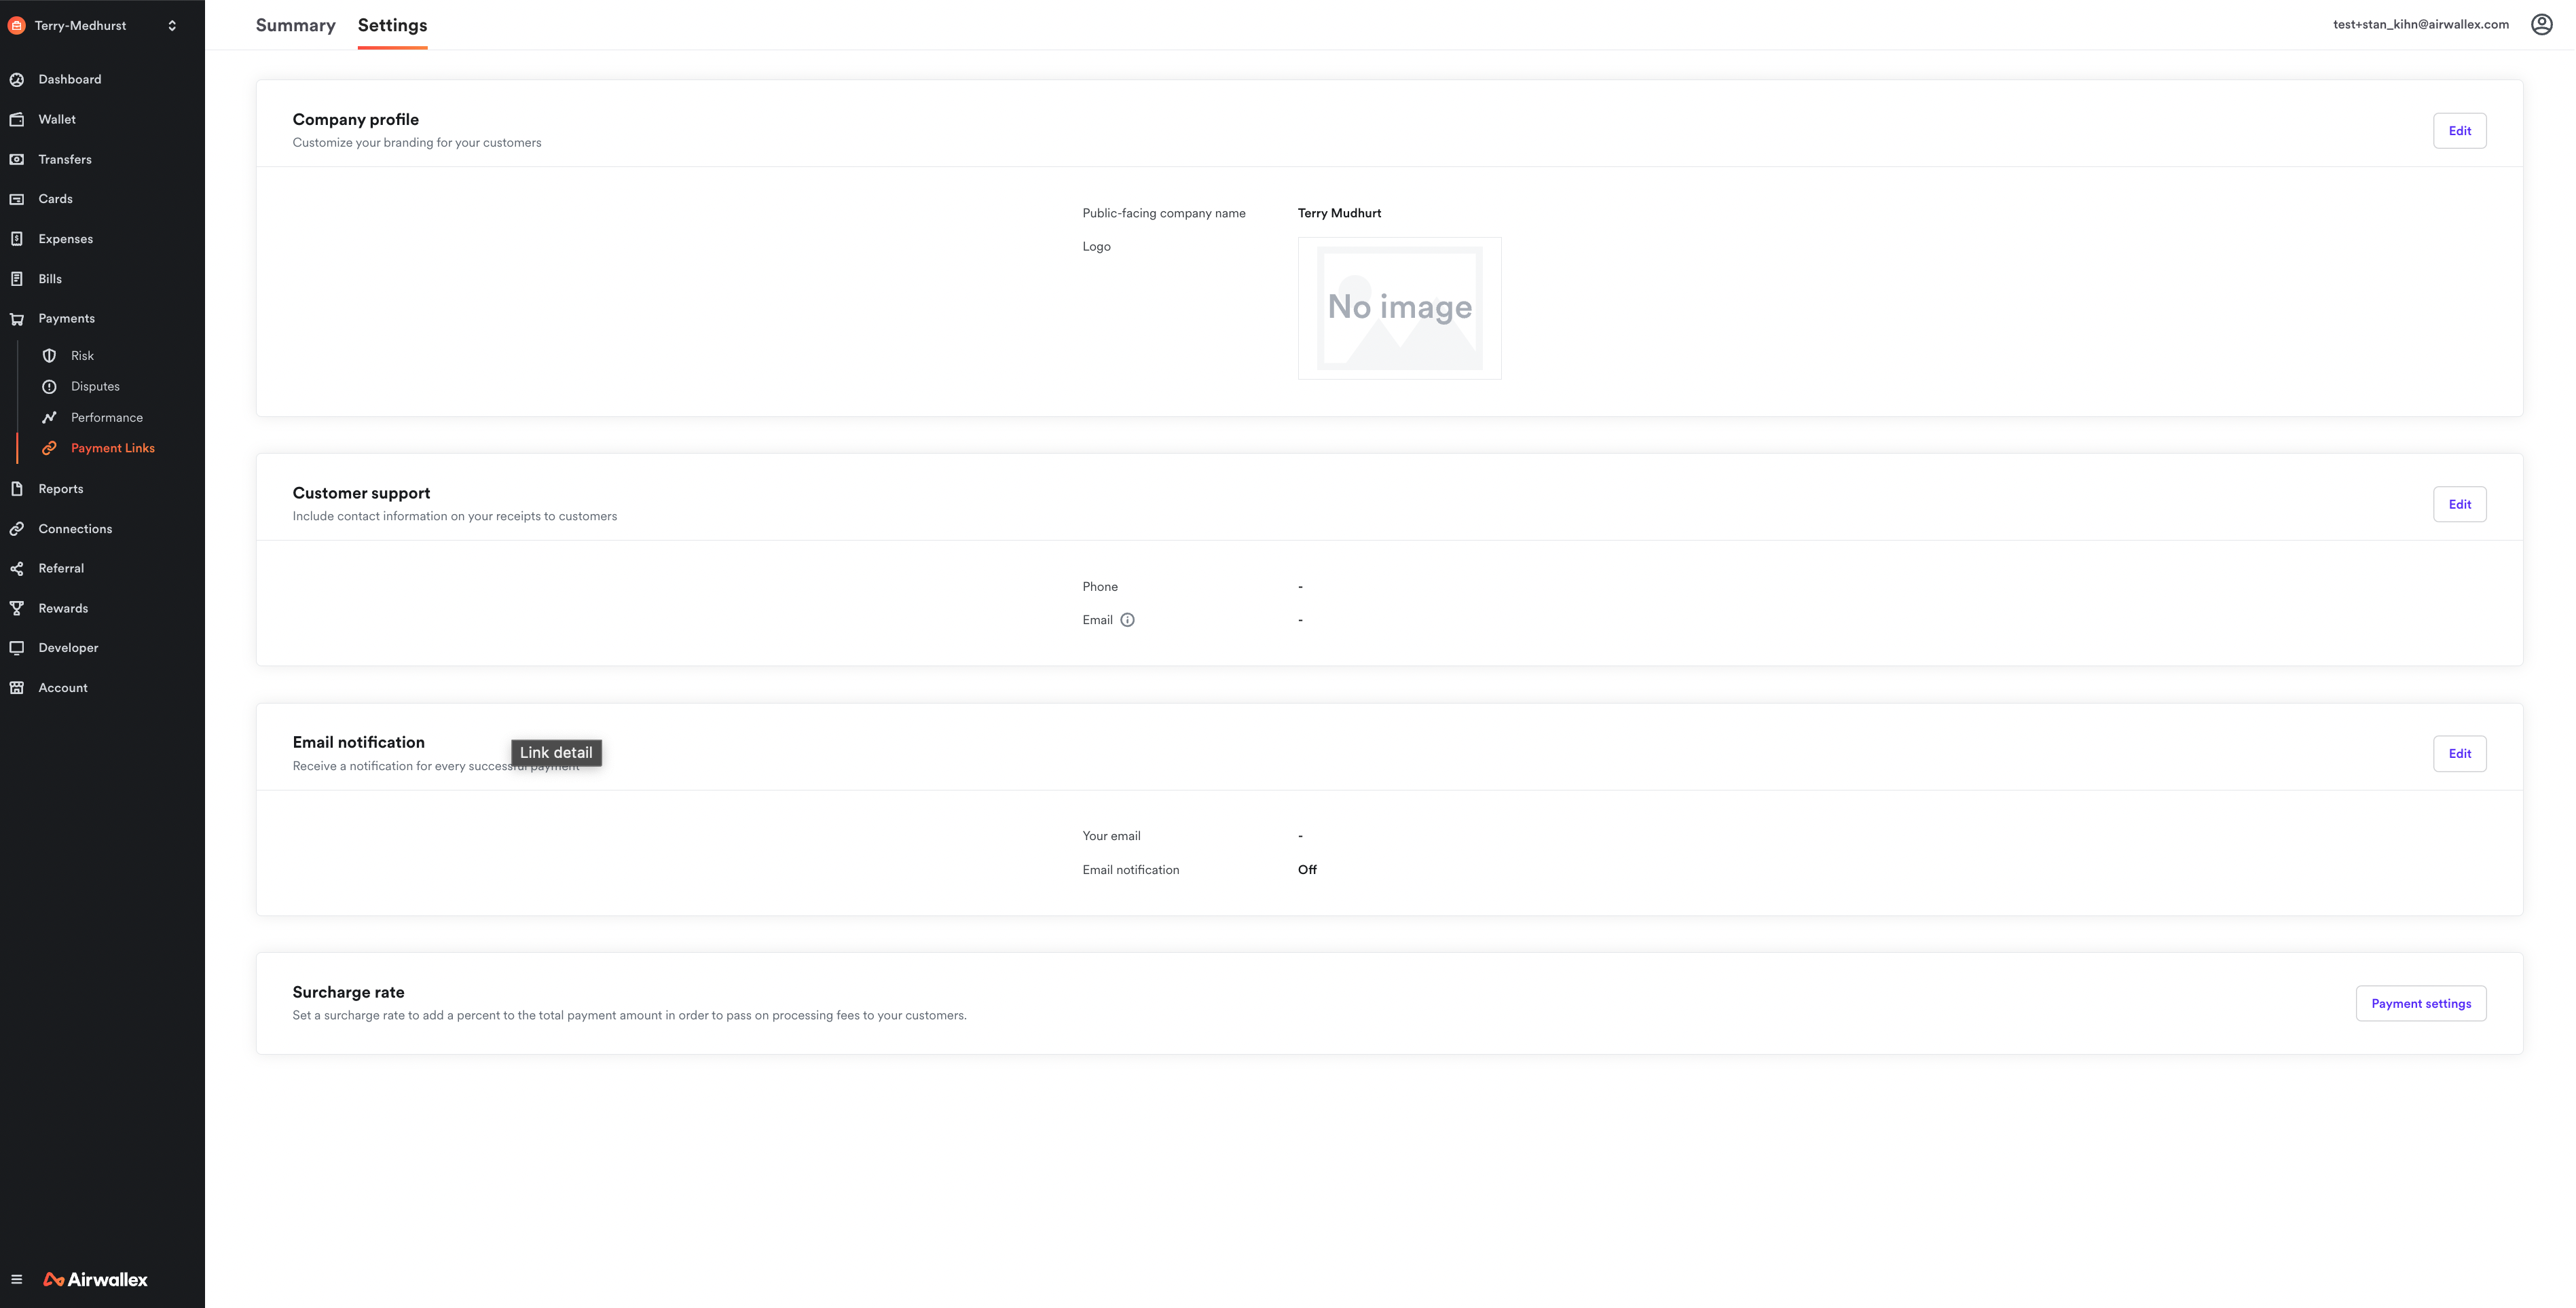
- Customize your company name, logo, contact information, and where to receive email notifications.

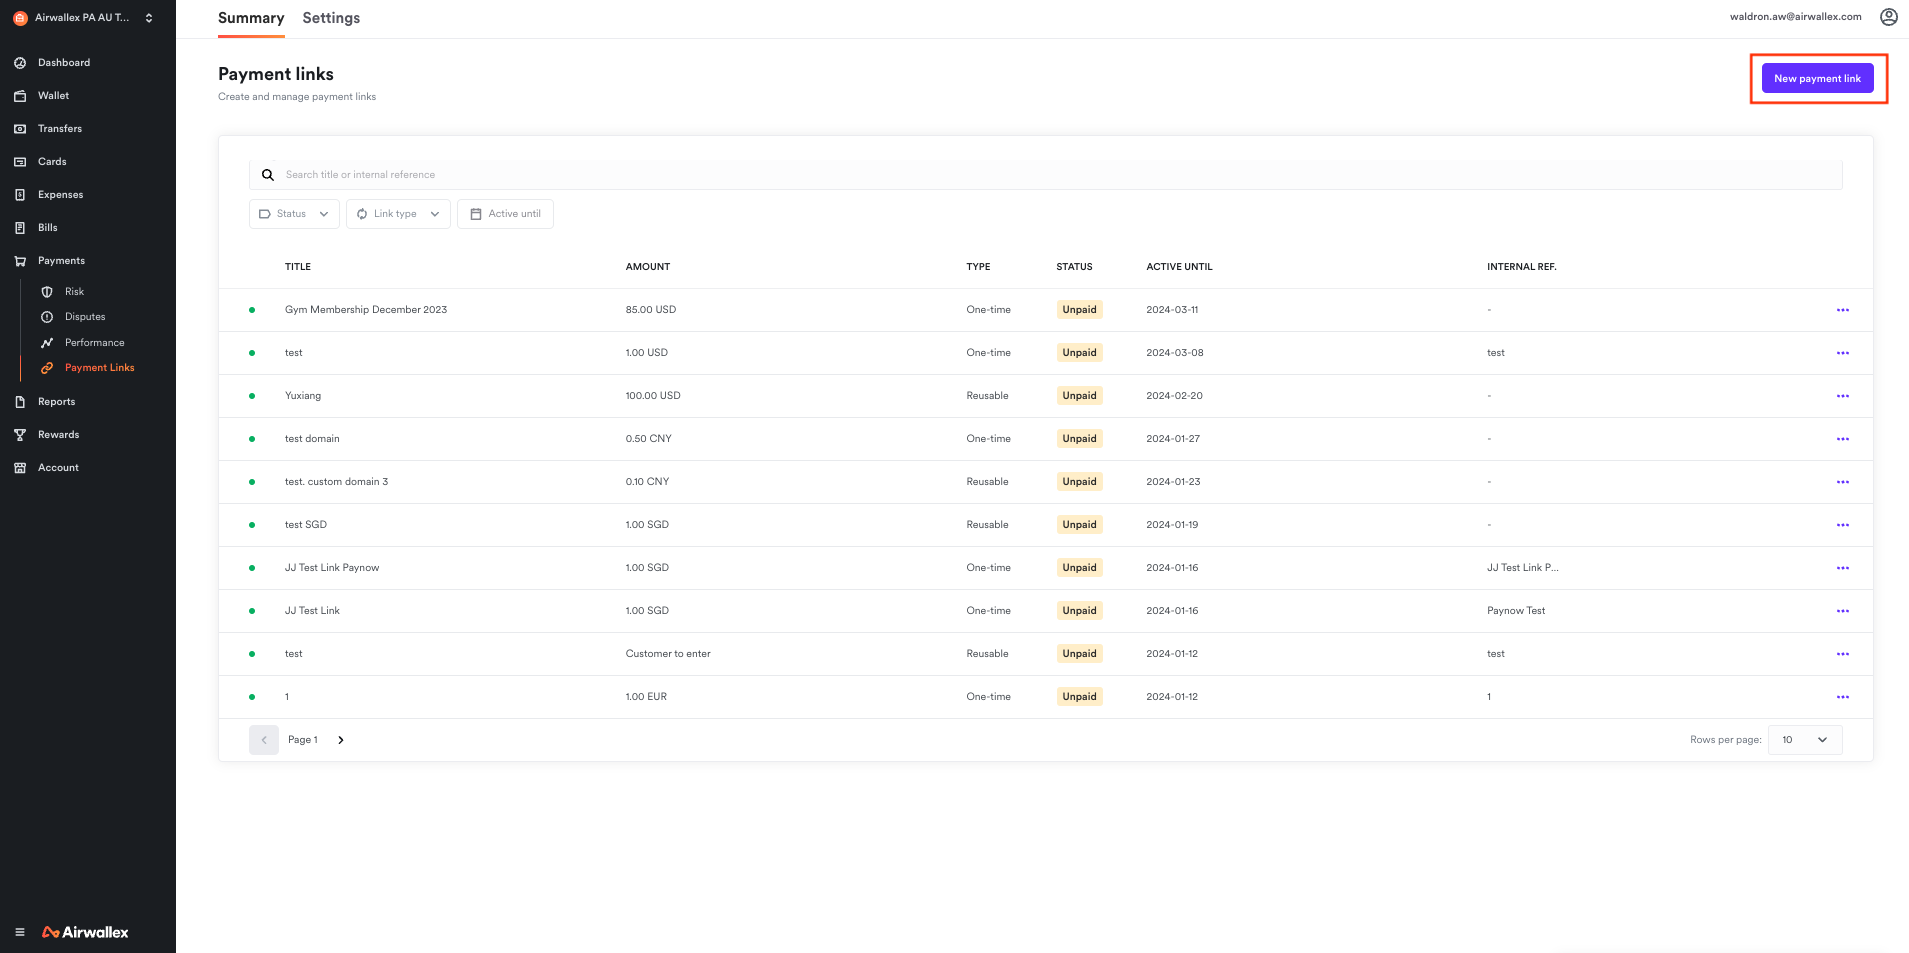
Create a payment link
Upon successful completion of onboarding, simply go to Payments > Payment Links > New payment link to create a payment link.
Fixed amount vs. custom amount
You can choose to share a payment request with a fixed amount and currency or leave it for the shopper to enter.
For payment links with a fixed amount (for example, invoices, specific products or services)
- Select “I will enter the amount”.
- Enter the amount and currency.
- Enter the payment link title, description (optional) and internal reference (optional).
- Choose what additional information to collect from your shopper.
- Select a link validity type (one-time or reusable) and set an expiration date.
- Preview the link and click “Create”.
For payment links where shoppers decide on how much to pay (for example, a generic link to be attached to all invoices or to collect donations)
- Select “My customer will enter the amount”.
- Choose which currencies you want to collect payment in and what default currency you want displayed to the customer.
- Enter the payment link title, description (optional) and internal reference (optional).
- Choose what additional information to collect from your shopper.
- Select a link validity type (one-time or reusable) and set an expiration date.
- Preview the link and click “Create”.
Shoppers can pay with the payment methods that the merchant has selected during the onboarding process.

Please collect billing address to leverage Address Verification Service
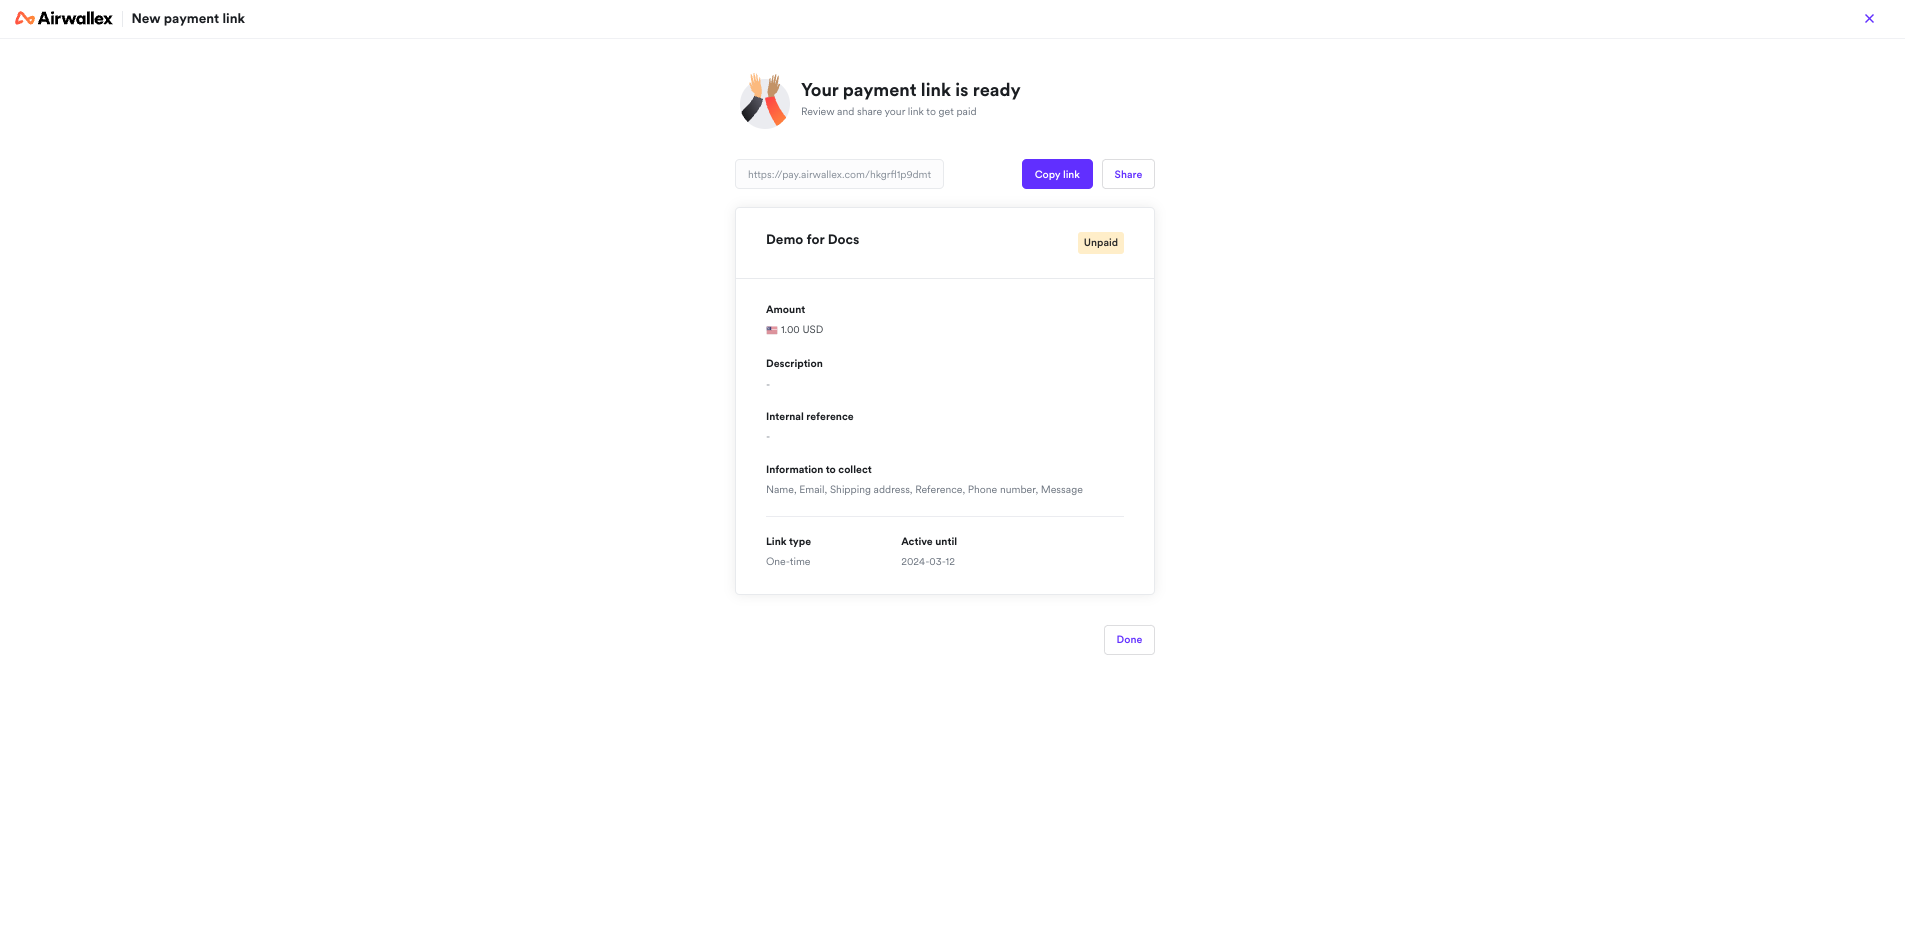
Share a payment link
Once the link is created, copy the URL to share or click “Share” to email it to a shopper or download the QR code.
Track payments
When a payment is complete, you will receive an email notification at the email address set within Payments > Payment Links> Settings > Email Notifications section. All payments received on a specific payment link can be reviewed by clicking into the link details.
Manage payment links
You can manage all the created requests via the web app. Supported actions include:
- Edit a payment link
- Activate/deactivate a payment link
- Delete a payment link
- View transactions made with a given payment link
You can also review transactions in Payments on the left navigation bar for more details.